


By Sascha Rommelfangen February 23, 2023
fail2ban - MISP
fail2ban is known to do a great job at giving attackers a hard time when they try to “test” passwords or enumerate users of a service. fail2ban constantly analyses relevant log files and keeps track of IP addresses trying to log into such services. If a configurable threshold is reached, it uses the Linux firewall (Netfilter / iptables) to block the suspected attackers.
So far, so good, so known.
The question is, why should we stop there? We could easily (seriously!) push those offending IP addresses into a MISP instance, share the information with the world and keep those bloody attackers out of way more machines than only the ones we run fail2ban on. Alternatively, we could use the collected information for correlation purposes and for retrospective views during forensic investigations.
If a MISP server is reachable, production machines can use this to immediately feed the Threat Intelligence Sharing platform.
Additionally, we can also easily set up a honeypot instead of just tolerating invalid login attempts. Block it immediately, share it immediately.
Too good to be true? Worried about complex configuration instructions incoming? On the contrary!
We only need an available MISP server, fail2ban, some configuration settings and a bash script.
Here are the steps:
apt install fail2ban
create a new file /etc/fail2ban/action.d/misp.conf
insert the following content into it and modify the values of the following variables: misp_auth_key, misp_base_url, misp_event, misp_sight
# Fail2Ban configuration file
#
# Author: 	Sascha Rommelfangen, CIRCL
# Version: 	2023-02-23

# Action to send IP address to your MISP server
# Requirements: access to a MISP server, knowing the base URL and possessing a valid auth key
# IP is sent to MISP and registered as a new indicator of compromise
# If the indicator is already known, a sighting will be added

[Definition]

# Option:  actionstart
# Notes.:  command executed on demand at the first ban (or at the start of Fail2Ban if actionstart_on_demand is set to false).
# Values:  CMD
#
actionstart =

# Option:  actionstop
# Notes.:  command executed at the stop of jail (or at the end of Fail2Ban)
# Values:  CMD
#
actionstop =

# Option:  actioncheck
# Notes.:  command executed once before each actionban command
# Values:  CMD
#
actioncheck =

# Option:  actionban
# Notes.:  command executed when banning an IP. Take care that the
#          command is executed with Fail2Ban user rights.
# Tags:    See jail.conf(5) man page
# Values:  CMD
#
#actionban =
actionban = /usr/local/sbin/misp_add_attribute.sh <ip> <misp_auth_key> <misp_base_url> <misp_event> <misp_sight>

# Option:  actionunban
# Notes.:  command executed when unbanning an IP. Take care that the
#          command is executed with Fail2Ban user rights.
# Tags:    See jail.conf(5) man page
# Values:  CMD
#
actionunban =

# Option:  misp_auth_key
# Notes    MISP server API auth key
# Values:  STRING  Default: None
#
misp_auth_key = YOUR_AUTH_KEY_HERE

# Option:  misp_base_url
# Notes    MISP server base URL
# Values:  STRING  Default: None
#
misp_base_url = https://misppriv.circl.lu

# Option:  misp_event
# Notes    The MISP event that is to be used
# Values:  STRING  Default: None
#
misp_event = 107539

# Option:  misp_sight
# Notes    Enable MISP sightings when an indicator is already known
# Values:  STRING  Default: false
#
misp_sight = true
Then create the bash script /usr/local/sbin/misp_add_attribute.sh:
#!/bin/bash
OFFENDING_IP="$1"
MISP_AUTH_KEY="$2"
MISP_BASE_URL="$3"
MISP_EVENT="$4"
MISP_SIGHT="$5"
LOGFILE="/tmp/fail2ban2misp.log"
# Start logging entry
date >> $LOGFILE
echo "$OFFENDING_IP" | hexdump -C >> $LOGFILE
# send indicator to MISP server
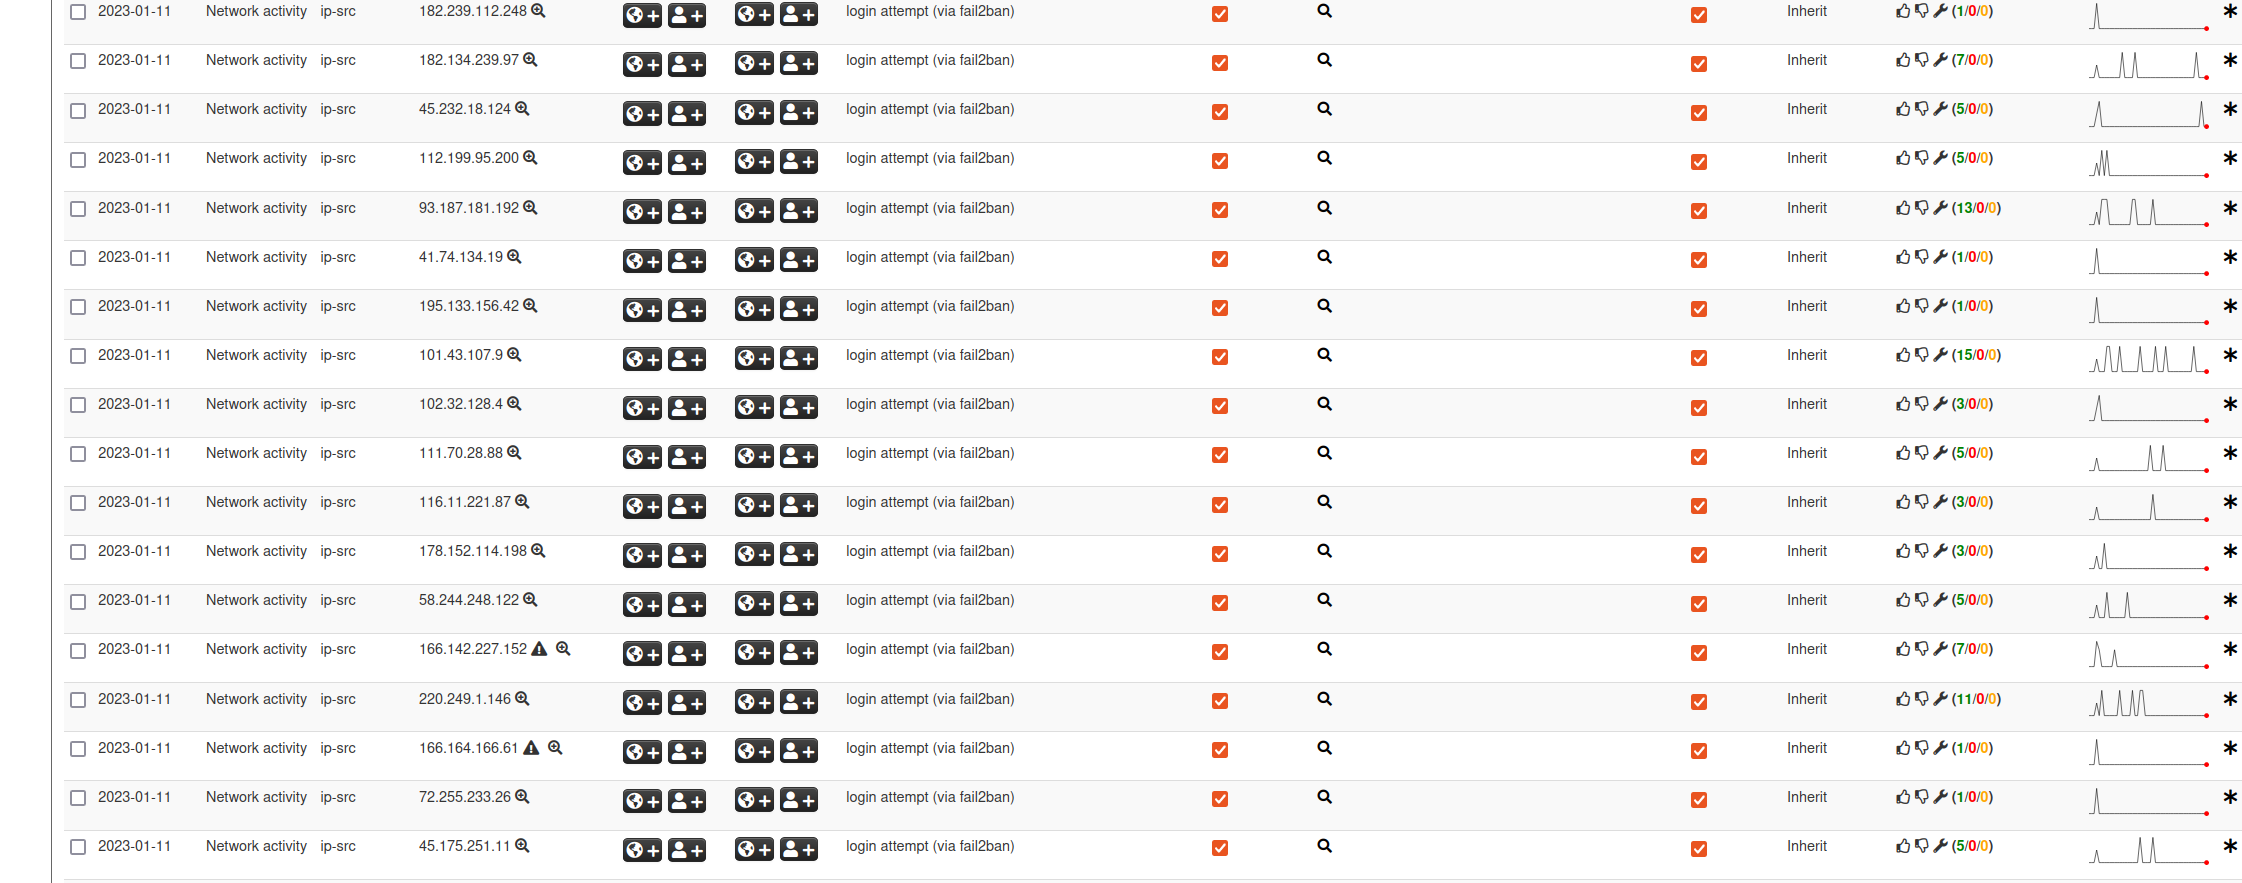
res=`curl -s --header "Authorization: $MISP_AUTH_KEY" --header "Accept: application/json" --header "Content-Type: application/json" -d "{\"category\": \"Network activity\", \"type\": \"ip-src\", \"value\": \"$OFFENDING_IP\", \"to_ids\": true, \"comment\": \"login attempt (via fail2ban)\"}" -X POST $MISP_BASE_URL/attributes/add/$MISP_EVENT`
echo $res >> $LOGFILE
# check if the indicator already exists and sighting is enabled in the configuration
if [[ `echo $res | grep "similar attribute"` =~ "A similar attribute already exists for this event" && $MISP_SIGHT != "false" ]]
then
# add a sighting instead
res=`curl -s --header "Authorization: $MISP_AUTH_KEY" --header "Accept: application/json" --header "Content-Type: application/json" -d "{\"category\": \"Network activity\", \"type\": \"0\", \"value\": \"$OFFENDING_IP\"}" -X POST $MISP_BASE_URL/sightings/add`
echo $res >> $LOGFILE
else
echo "Not sighting $OFFENDING_IP due to configuration setting" >> $LOGFILE
fi
and make it executable (chmod a+x /usr/local/sbin/misp_add_attribute.sh)
Now configure the file /etc/fail2ban/jail.d/defaults-debian.conf and enable the services you want to monitored by fail2ban:
[sshd]
enabled = true

[dovecot]
enabled = true

[postfix]
enabled = true

[postfix-sasl]
enabled = true

[apache-auth]
enabled = true

[pam-generic]
enabled = true
mode = aggressive
In the file jail.local configure your defaults:
# "ignoreself" specifies whether the local resp. own IP addresses should be ignored
# (default is true). Fail2ban will not ban a host which matches such addresses.
ignoreself = true

# "ignoreip" can be a list of IP addresses, CIDR masks or DNS hosts. Fail2ban
# will not ban a host which matches an address in this list. Several addresses
# can be defined using space (and/or comma) separator.
ignoreip = 127.0.0.1/8 ::1 # add more IPs here you can trust

# External command that will take an tagged arguments to ignore, e.g. <ip>,
# and return true if the IP is to be ignored. False otherwise.
#
# ignorecommand = /path/to/command <ip>
ignorecommand =

# "bantime" is the number of seconds that a host is banned.
bantime  = 12h # 12 hours should be painful enough

# A host is banned if it has generated "maxretry" during the last "findtime"
# seconds.
findtime  = 360m # the sliding lookup window

# "maxretry" is the number of failures before a host get banned.
maxretry = 1 # this is far from conservative. I bad hit -> banned. Use only in honeypots or if you have stable/knowledgeable users
and add pushing to misp to your preferred actions, e.g.:
# The simplest action to take: ban only
action_ = %(banaction)s[name=%(__name__)s, port="%(port)s", protocol="%(protocol)s", chain="%(chain)s"]
          	  misp

# ban & send an e-mail with whois report to the destemail.
action_mw = %(banaction)s[name=%(__name__)s, port="%(port)s", protocol="%(protocol)s", chain="%(chain)s"]
            %(mta)s-whois[name=%(__name__)s, sender="%(sender)s", dest="%(destemail)s", protocol="%(protocol)s", chain="%(chain)s"]
            misp

# ban & send an e-mail with whois report and relevant log lines to the destemail.
action_mwl = %(banaction)s[name=%(__name__)s, port="%(port)s", protocol="%(protocol)s", chain="%(chain)s"]
             %(mta)s-whois-lines[name=%(__name__)s, sender="%(sender)s", dest="%(destemail)s", logpath="%(logpath)s", chain="%(chain)s"]
             misp
Now do a /etc/init.d/fail2ban restart
For troubleshooting check the output of
/etc/init.d/fail2ban status/var/log/fail2ban.log/tmp/fail2ban2misp.log
That’s it! Happy collecting!